I went to Lowe’s over the weekend to buy some plants for the yard. While I was there I started buying parts for my Do-it-yourself Honey Extractor. I am trying to keep the cost under $75 for everything except the tools. If you don’t have a drill, metal shears, and a screwdriver this project will cost you more.
I bought a medium size plastic garbage container. It is about 24 inches in diameter and about 30 inches deep. I could have bought a galvanized steel garbage can of the same size for a little more. It is up to you, but I am going as cheap as I can.
I bought two 3/8″ Galvanized Floor Flanges. I need these to hold the central axle which is a three foot length of 3/8 inch threaded rod.
Floor flanges look like this:
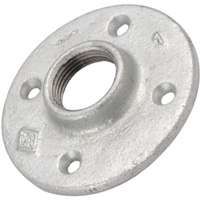
As you can see, it has a place to screw in a threaded pipe, and a flat bottom to attach it to things.
A short length of 3/8 threaded is called a nipple. I bought two 2-inch 3/8 inch nipples. Nipples are what plumbers call a short length of threaded pipe.
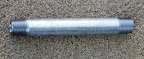
I will screw the nipples into the flanges. I will then attach one to the center of the garbage can lid and one to the bottom of the can.
Since I will be using the flange and nipple to hold the threaded rod steady, I need some kind of metal shield or “strike” under the bottom flange in order to keep the threaded rod from drilling into the plastic bottom of the can and eventually punching a hole in it.
I bought the cheapest piece of steel that I could find, which is an electrical box cover. I wanted to get the round box, but they all had a knockout in the center and I didn’t want to have the rod break through it. This is what I bought:
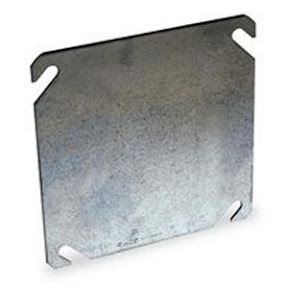
I will place this under the flange so that the rod rests on it. It will also give added stiffness to the bottom flange so that the force of the spinning frames doesn’t rip up the thin plastic of the garbage can.
I bought a box of 3/4 inch 10-24 machine screws and nuts to hold this all together. 10-24 screws are about 3/16 of an inch. They will fit well into the hole from a 3/16 inch drill.
I have to drill 4 holes in the box cover and then drill 8 holes in the bottom of the garbage can and attach the parts to the bottom of the can using the machine screws.
I will attach the other floor flange to the top of the lid in the center. I might use another electrical box here also to add stiffness. I will have to drill a 3/8 inch hole in the center of the box and the lid so that the rod can go through the lid and stick up.
I will file down the top of the threaded rod into a square shape (don’t worry, I’ll have pictures). This will make it easier to attach my drill to it so I can use the drill to spin the frames.
One night this week, or Saturday if I have time, I will get this part done and take pictures.
The frame holders will be made out of galvanized sheet rock bead. I am not sure it will be strong enough, so I will hold off until I get it working before I do part 2 of this project.
I think that I can use heavy duty large rubber bands to hold the frames steady while they spin. Think cheap. I have a super full of honey just waiting to try this baby out.
One last thing – I bought a honey gate from http://www.blueskybeesupply.com/ on eBay. It only cost me $10 with free shipping. You can buy a plastic 1.5 inch valve from Lowe’s that might do as well, but this is threaded and looks like it will be easy to insert into the garbage can. They have them on the website and their prices are low for most things (but not everything so compare). You might order more stuff to get a better rate on shipping. Every time I go back to the website there is more stuff.